Windows Backup Server 2008 - Part 2 - Hallo friend
Tips and Trick Outside, In the article you read this time with the title Windows Backup Server 2008 - Part 2, we have prepared well for this article you read and download the information therein. hopefully fill posts
Article Windows Server, i hope with the article we write, you can understand. Well, happy reading.
Title :
Windows Backup Server 2008 - Part 2link :
Windows Backup Server 2008 - Part 2
Read more
Windows Backup Server 2008 - Part 2
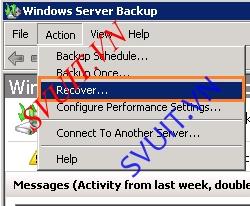
3. Thực hiện recovery dataVào Action > Recover
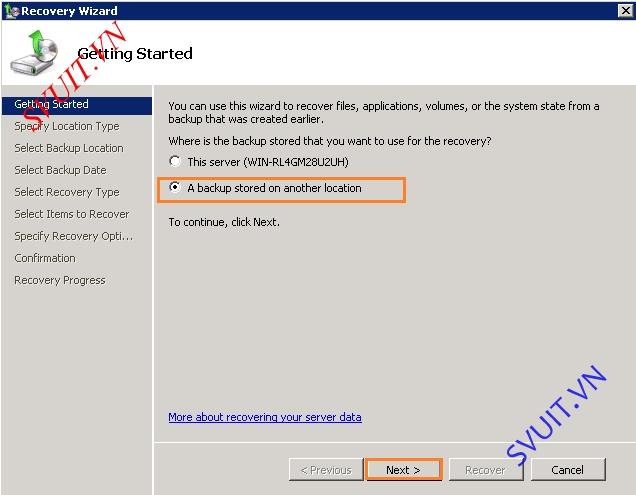
Chọn A backup stored on another location
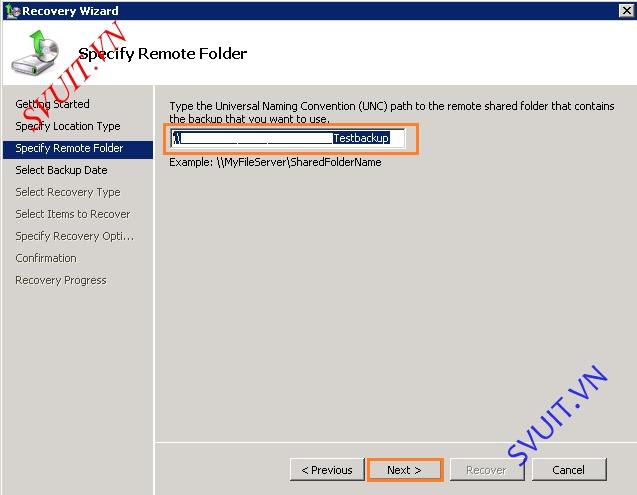
Chọn Remote Shared folder

Sử dụng đường dẫn chứa file backup ở server khác
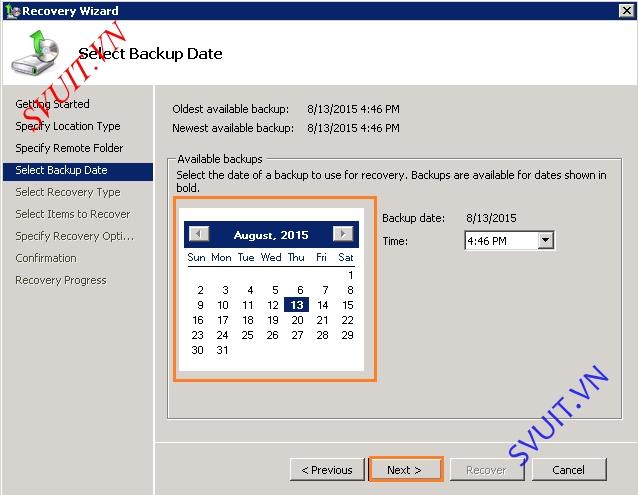
Chọn bản backup muốn recover
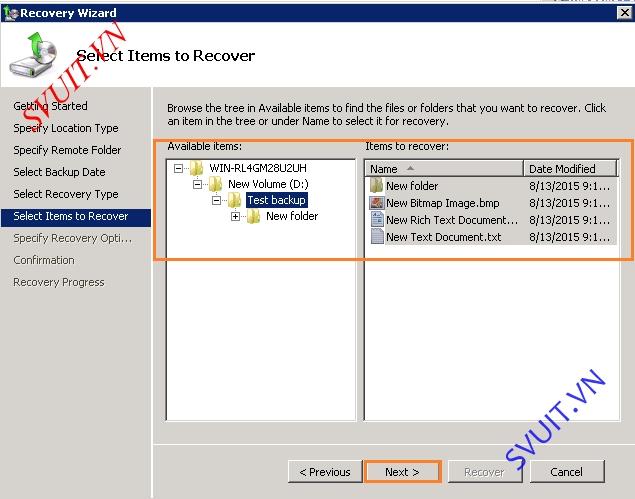
Chọn kiểu muốn recover là Files and Folders
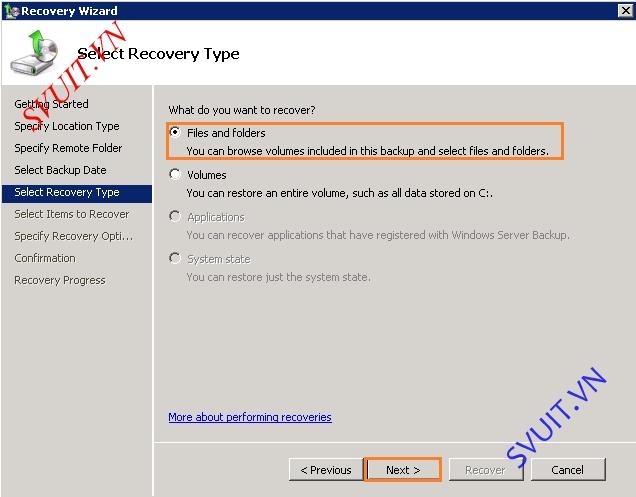
3.1. Recover File
Chọn recover 1 file

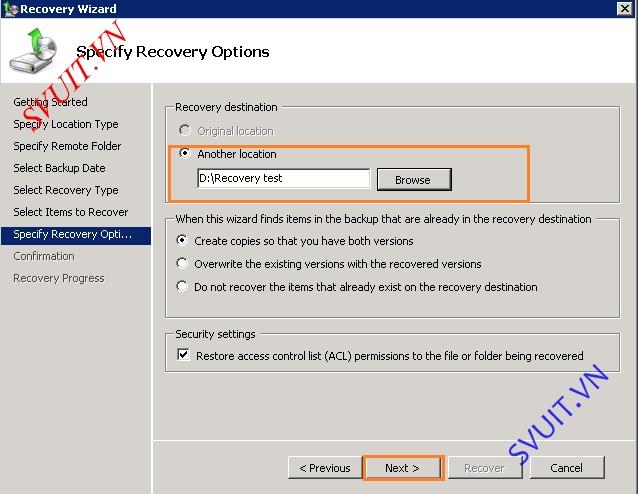
Chọn đích chứa file recover
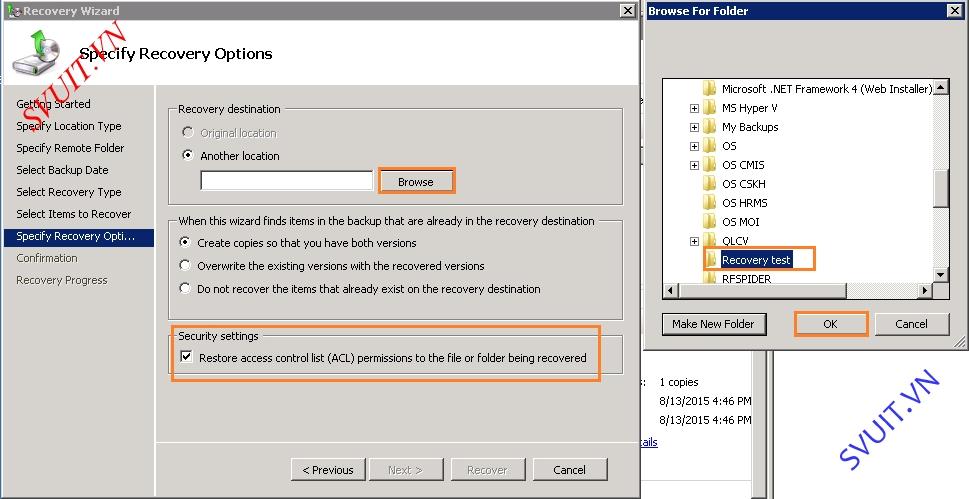
Tùy chọn thêm các option recover
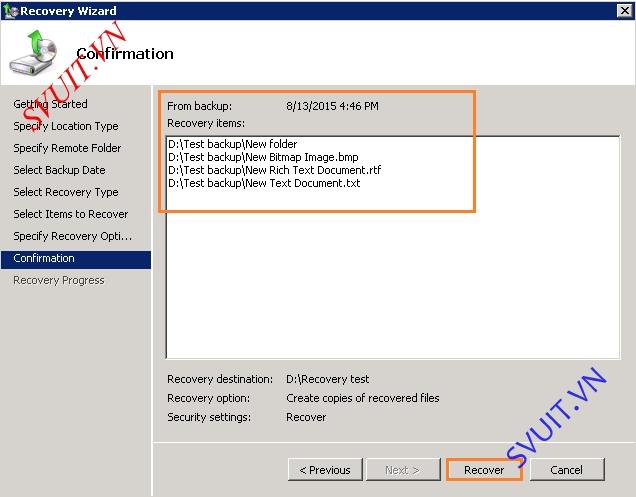
Chọn Recover
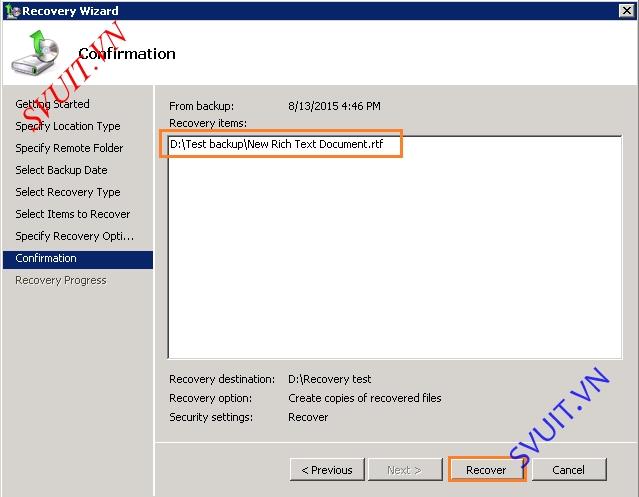
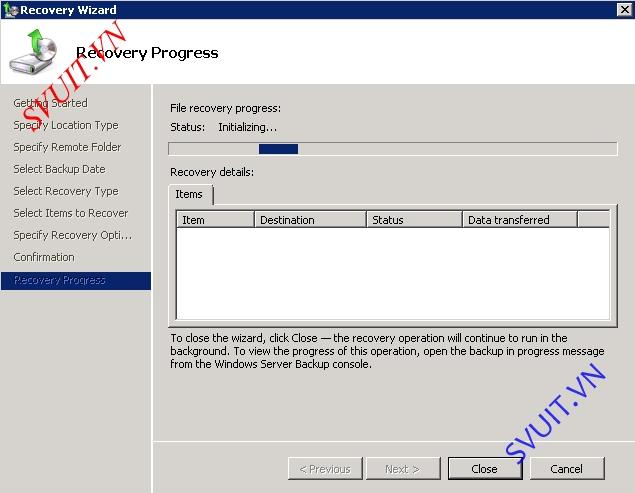
Quá trình recover bắt đầu và hoàn thành
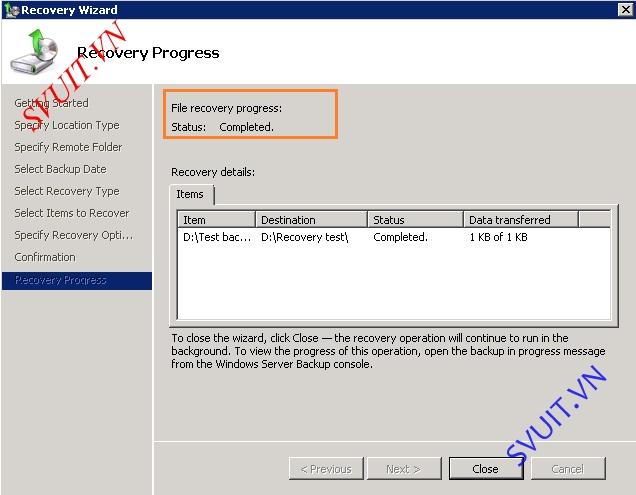
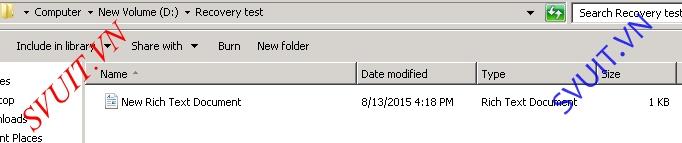
Kiểm tra file đã được recover
3.2. Recover folder
Kiểm tra các file và folder đã được recover, các file có tên trùng nhau sẽ được recover và đổi sang tên khác tùy theo lựa chọn trong option recover.

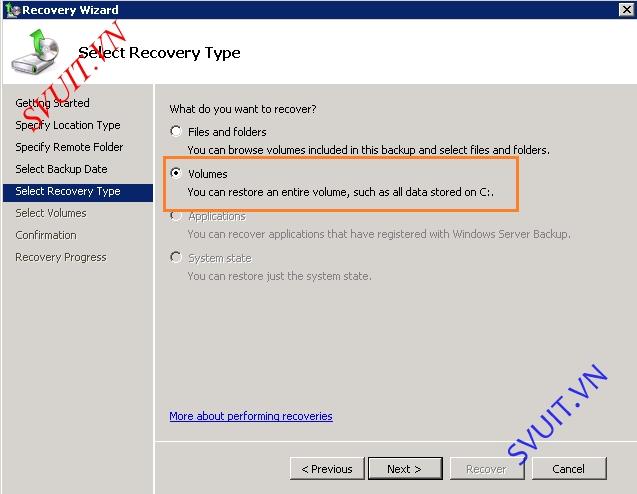
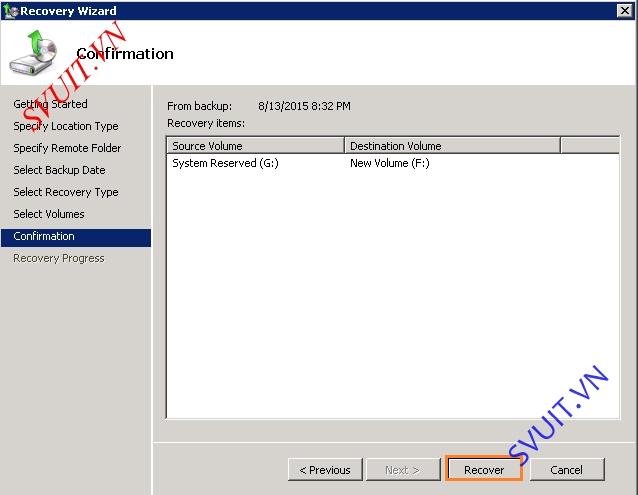
3.3. Recover volume
Khôi phục volume, làm tương tự các bước recover như trên đến bước Select Recovery Type, chọn Volumes
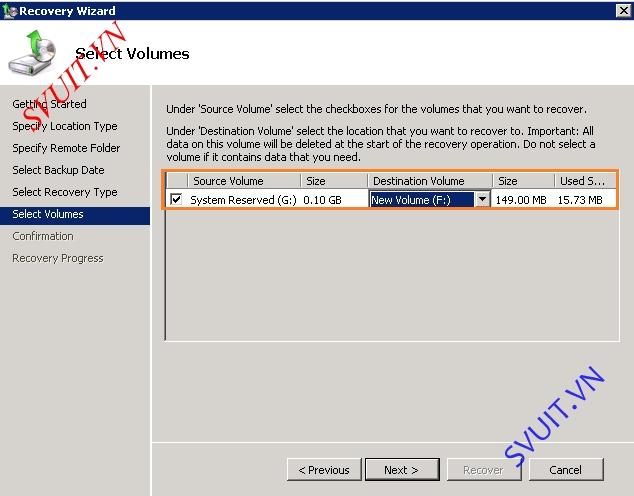
Chọn Source và Destination Volumes
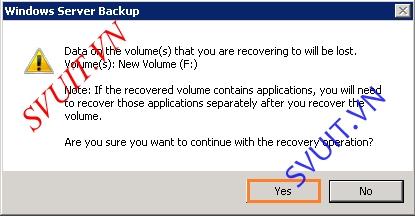
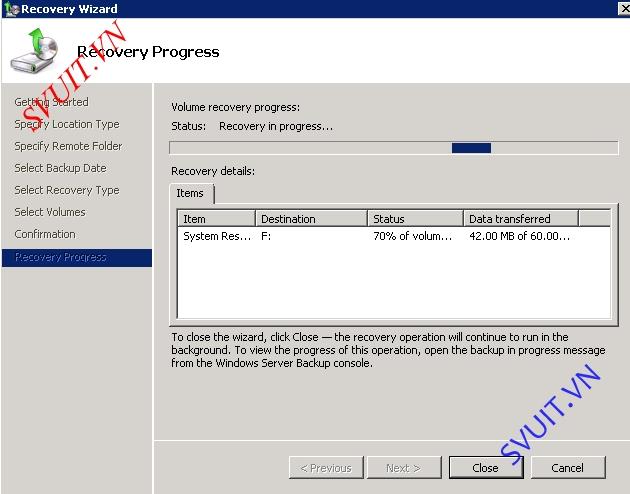
Thông báo dữ liệu trên Destionation volume sẽ bị mất, chọn Yes
Chọn Recover
Quá trình recover được thực hiện và hoàn thành
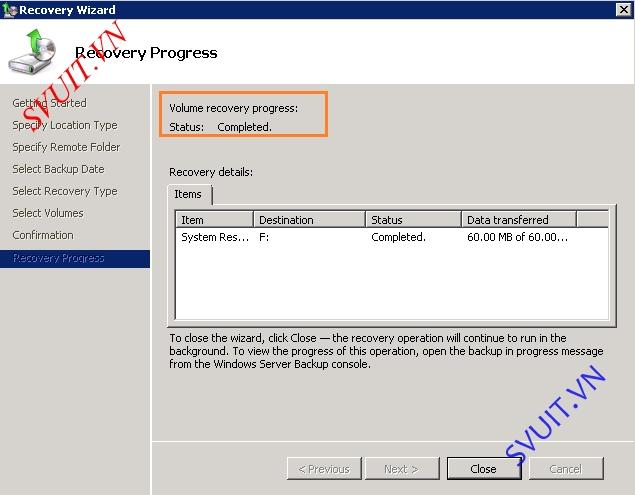
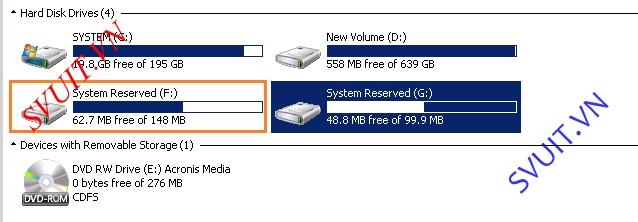
Kiểm tra volume đã được recover
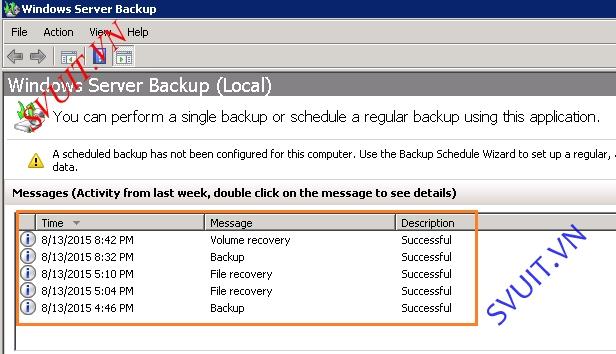
Log báo quá trình backup và recover đã thành công
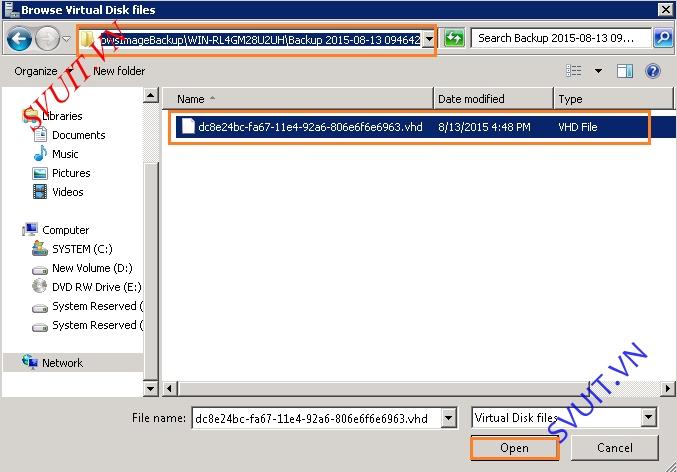
4. Kiểm tra file backupCác file backup sẽ được lưu dưới định dạng file vhd, ko nằm dưới dạng các folder và các files để chúng ta có thể dễ dàng kiểm tra. Trong trường hợp này, để kiểm tra các file và folder trong file vhd, ta cần attach file vhd vào để kiểm tra. Các bước thực hiện như sau:
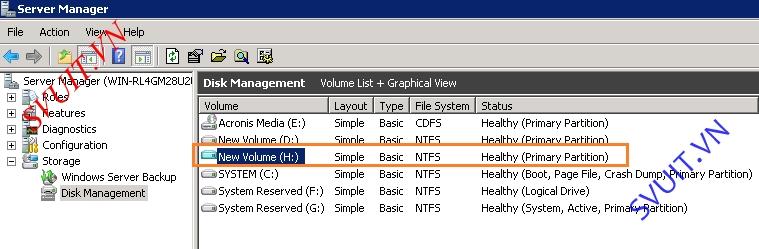
Vào Server Manager > Storage, chuột phải Disk Management, chọn Attach VHD

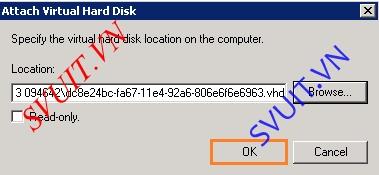
Chọn đường dẫn đến nơi lưu file VHD và chọn file VHD, chọn Open
Chọn OK
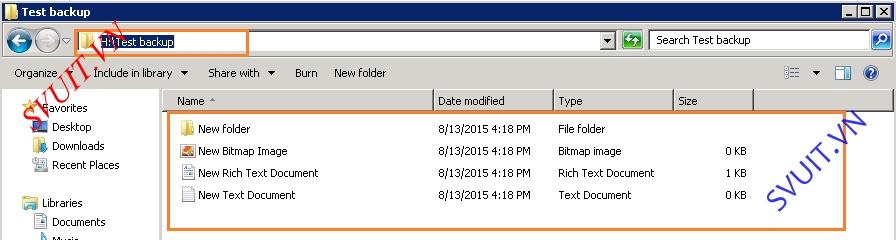
Kiểm tra volume mới được tạo ra dựa trên file VHD và kiểm tra lại các file và folder có trong file VHD
Sau khi kiểm tra xong, chuột phải Disk chứa file VDH, chọn Detach VHD để tách file VHD ra khỏi trình quản lý Disk Management của windows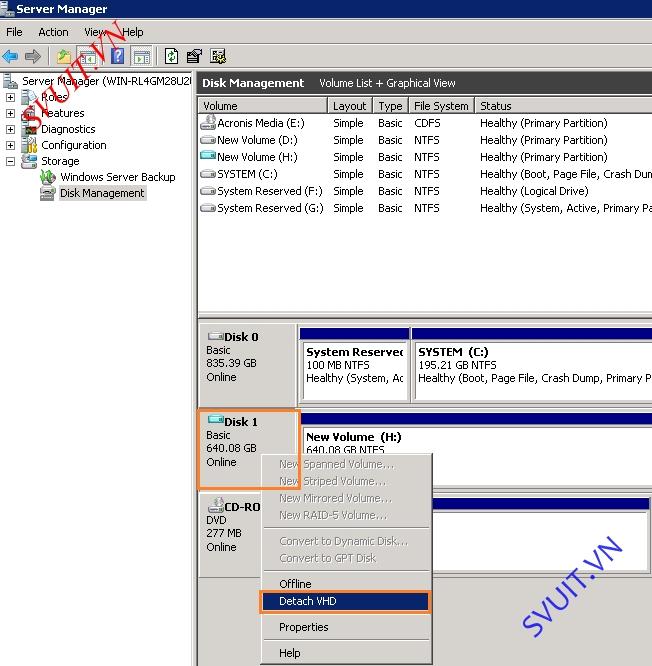
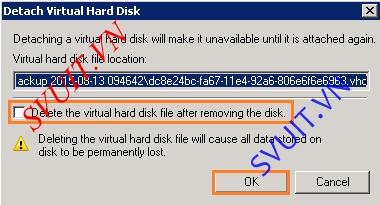
Chú ý: không chọn Delete the virtual hard disk file after removing the disk, chọn OK
Nguồn: http://svuit.vn/
http://www.slideshare.net/laonap166/windows-backup-server-2008-part-2
Declares Article Windows Backup Server 2008 - Part 2
That its all Windows Backup Server 2008 - Part 2 This time, hopefully can provide benefits to all of you. Okay, see you in another article posting.
You now read the article Windows Backup Server 2008 - Part 2 with the link address https://trik-outside.blogspot.com/2016/03/windows-backup-server-2008-part-2.html
0 Response to "Windows Backup Server 2008 - Part 2"
Post a Comment